 |
 |
 |
|
Part 3 - Using Quantrac 2005
-
29 -
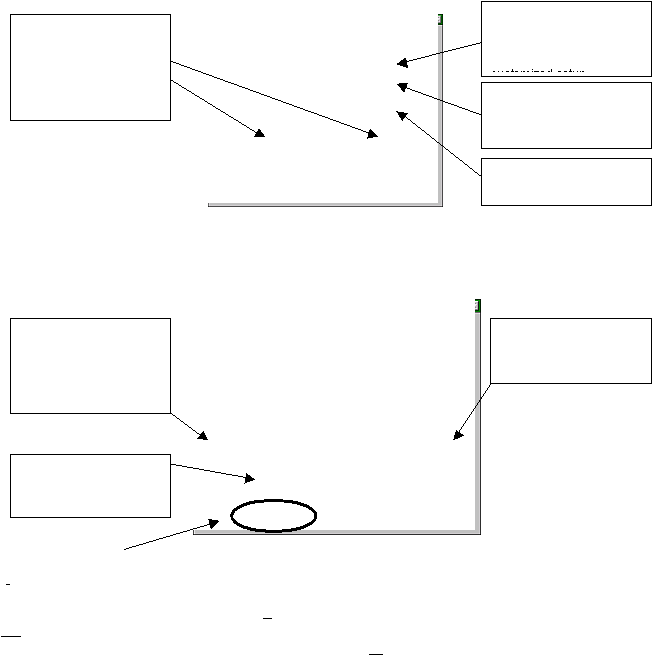
information about the particular zone. In this example, the location of the outside unit is noted.
Clicking the Add Equipment button accessed this Add Equipment form (for the jobsite address above). This example
shows how equipment is recorded manually…not from inventory.
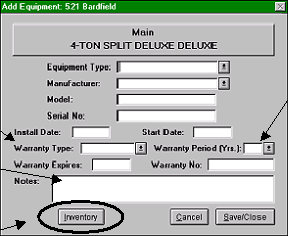
The previous example showed how to manually enter equipment into a jobsite zone (but not from inventory). This
example demonstrates how equipment can be moved from your serialized inventory to a jobsite’s zone.
The same form for entering equipment is used for manual recording of equipment or moving equipment from inventory
to a customer’s jobsite and zone.
Instead of manual entry of the type, model number, serial number, etc., click the mouse with the cursor on the
Inventory button above. The following form will appear.
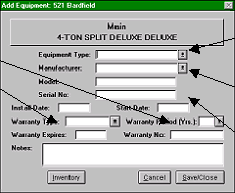
The equipment type can be
entered by hand, or
selected from the drop-
down list from you
Likewise, the Manufacturer
can also be hand entered
or selected from your
customized drop-down list.
Enter the Model and Serial
number of the equipment
item here.
The installation date and
start date of a piece of
equipment may be
different. Enter each in
the fields provided. The
start date initializes the
warranty period.
Select the warranty type
(from your customized list
and the warranty period)
The expiration date will be
computed and entered by
the system.
Enter the 2nd
-5th or 2nd
-10th
extended protection plan
number here if applicable.
Enter any notes about this
particular piece of
equipment in the Notes
field.
This form was obtained by clicking the Add Equip Installed by us button on the Equipment and Warranties form. You
can manually enter the equipment, but that will not reduce inventory. You will, however, be notified you if the model and
serial numbers entered are an exact match with a unit that you do have in inventory. Follow the on screen instructions if
you wish to use the inventoried item instead.