 |
 |
 |
|
Part 2 – System Customization - 2 -
Setup/Customization of Quantrac 2005
After starting the system and logging on, your next step is to customize Quantrac 2005 for your company. This
includes information such as your company’s name and address, the types of calls that you make (emergency,
nuisance, etc.), the names of your employees, and the prices that you charge for items listed in invoices, sales
quotes and job costs. By entry of this customization information, you are ensuring data entry consistency and
saving user time.
This customization (setup) procedure can take considerable time. However, your Quantrac 2005 software comes
pre-loaded with many setup categories and lists already in place to help you. Many of these items will not need to
be changed. Nevertheless, there are some items (such as cities in which you provide services); which may need to
be modified before you begin using the system. This will also provide good practice for navigating the system
since the customization procedure is similar to many other system functions. Also, please keep in mind that you
can modify or add any of this information at any time.
The following provides general “setup” instructions.
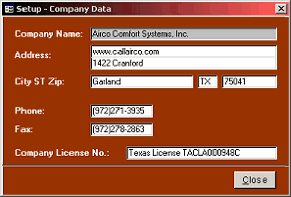
Entering Data Pertinent to your Company
This information will appear on reports, invoices,
correspondence, etc. generated in HVAC Office.
1.
Click “Setup|Company Data” on the menu bar to display
this form.
2.
Enter data pertinent to your company. (Your Company
Name has been coded into your database for security
purposes. It will appear on most reports that you print, as
well as on the Main Control form.)
3.
Click the Close button when finished.
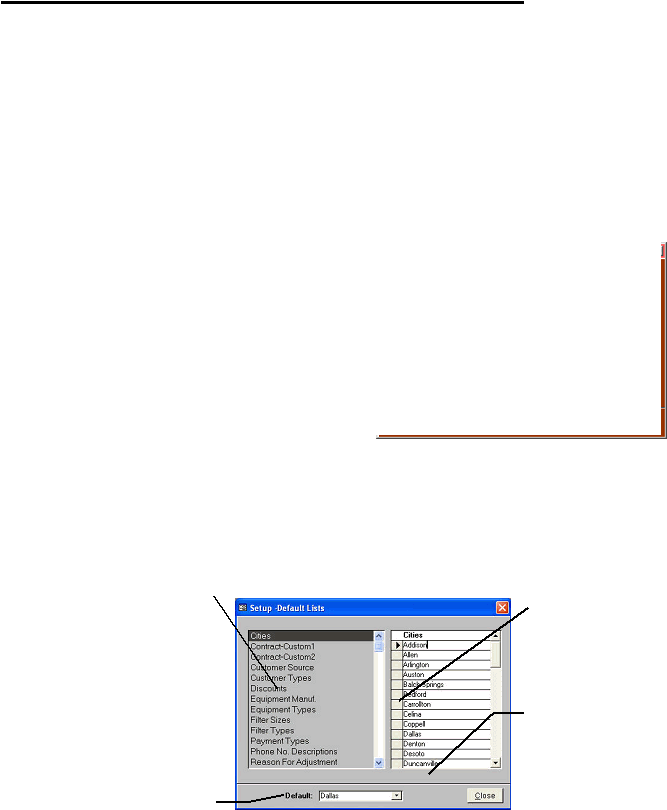
Entering System Default Lists
These are the default values and data that will aid in quick and accurate data entry in the different forms and
records throughout the system. You may return to this screen at any time to add, edit, or delete entries.
1.
Click “Setup|Lists” on the menu bar to display the form shown below.
2.
This form contains numerous lists of items that are used throughout the program. Here, “Cities” has been
selected. Some of these items should be customized at this time, but changes may be made at any time.
3.
Click the Close button when finished.
To select a different list, click on the
desired line.
You have the option of designating a
default “City”, “State” and/or “ZIP
Code”. For example, if you elect
“Dallas” as your default city, it will be
entered automatically (and can be
edited) each time you add a new
customer or jobsite. If you do not wish
to set a default, leave the “Default” field
blank. To delete an entry in the Default
field, click in the field and press
DELETE.
To add an item, type it
next to the asterisk (*)
at the bottom of the list.
To edit an item, click
within the text on the
desired line and edit.
To delete an item, click
the gray “Selector Box”
to its left, and press
your keyboard DELETE
key.